
Demonstrates wrist extension against elastic resistance to improve strength and endurance through a controlled range of movement.

Strengthening exercise focusing on bending the wrist against a weight to build wrist flexor strength and functional capacity.

Shows controlled wrist movement toward the thumb side against resistance. This exercise strengthens radial wrist stabilisers and improves control.

Demonstrates wrist extension against a handheld weight to strengthen the wrist extensor muscles as part of progressive rehabilitation.

Functional twisting movement using a cloth to strengthen the wrist and forearm muscles while improving coordination and grip endurance.

Combines grip strength with controlled elbow bending and wrist extension. This exercise improves coordination and functional upper-limb strength.

Gentle gripping exercise using a sponge or small ball to improve hand strength, circulation and control during wrist rehabilitation.

Demonstrates wrist flexor activation against resistance without joint movement. This exercise builds early strength while protecting the healing wrist.

Static strengthening exercise where the wrist pushes into resistance without movement. Helps activate wrist extensor muscles safely in the early stages of strengthening.

Static strengthening exercise where the wrist pushes into resistance without movement. Helps activate wrist extensor muscles safely in the early stages of strengthening.

Shows side-to-side wrist movement with the hand supported on a table. This exercise improves wrist mobility while minimising strain during early rehabilitation.

Demonstrates controlled bending and straightening of the wrist to restore range of movement and reduce stiffness following injury or immobilisation.

Demonstrates thumb straightening and movement across the palm toward the fingers. This exercise restores thumb mobility, coordination and functional hand use after cast removal.

Progresses the MCP grip into full knuckle flexion to further improve tendon excursion and finger range of movement following immobilisation.

Focuses on bending the knuckles while keeping the fingers relatively straight to encourage tendon movement. This exercise supports finger control and mobility during early wrist rehabilitation.

Guided movement into a full fist to encourage tendon gliding and finger flexion. Used post-cast to restore hand mobility and reduce swelling and stiffness.

Demonstrates a hook-fist position to promote smooth tendon movement through the fingers. This exercise helps reduce stiffness and improve finger mobility following cast removal.

Gentle thumb movements performed within the limits of the cast. This exercise helps maintain thumb mobility, reduce stiffness and support hand function while protecting the healing wrist.

This exercise focuses on bending the knuckles (metacarpophalangeal joints) while keeping the fingers relatively straight. It helps maintain finger joint mobility, reduce stiffness and support hand function during wrist and hand rehabilitation.

Demonstrates a full hand gripping movement performed while the wrist is immobilised in a cast. This exercise helps maintain finger strength, promote circulation and prevent stiffness in the hand during the early stages of wrist fracture recovery.

Shows a hook-fist movement where the fingers bend at the middle and end joints while the knuckles remain straight. This exercise is used during the cast phase to maintain tendon mobility and reduce finger stiffness without stressing the healing wrist.

This stretch targets the small muscle deep in the buttock that can cause sciatic-like pain when tight. From a seated or lying position, cross one ankle over the opposite knee and gently pull the leg toward the chest. Focus on a deep, steady stretch in the gluteal region to improve hip mobility and relieve pressure on the sciatic nerve.

This stretch targets the inner thigh muscles. Stand with a wide stance and shift your weight to one side, bending that knee while keeping the other leg straight. You should feel a pull along the inner thigh of the straight leg. Keep your chest up and hips back to deepen the stretch.

Focuses on the back of the thighs. From a standing or seated position, hinge at the hips with a flat back, reaching toward your toes. Keep a slight bend in the knees to protect the joints and ensure the stretch remains in the muscle belly. Hold for 30 seconds to improve flexibility and lower back health.

Stand on one leg, grab your opposite ankle, and pull your heel toward your glutes. Keep your knees together and tuck your pelvis to deepen the stretch in the front of the thigh. This improves hip mobility and knee health.

Lie on your back at the edge of a bench or bed, pulling one knee to your chest while letting the other leg hang freely. This position uses gravity to stretch the iliopsoas and rectus femoris. Ensure your lower back remains flat against the surface to isolate the hip flexors and prevent lumbar arching.

This stretch targets the iliopsoas and rectus femoris. Kneel on one knee with the other foot flat in front. Tuck your pelvis and shift your weight forward until you feel a pull in the front of your hip. Keep your torso upright to maximise the stretch.

Use stair jumps to develop elastic power; emphasise calf-driven take-off and quiet, controlled descents.

Develop lower-leg power and controlled landings with box jumps and drop-downs.
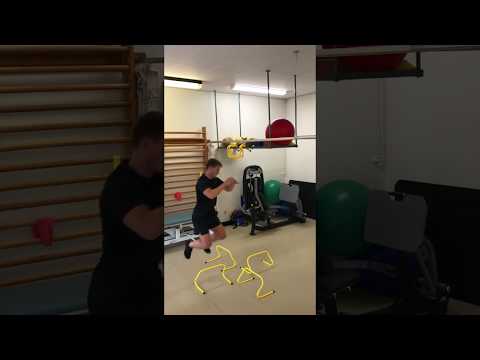
Challenge calf and lower-leg stability while training agility and change-of-direction with hurdle jumps and a sharp 90° turn.

Strengthen your calves and sharpen forward control with linear hurdle jumps.


Isolate and build strength in your calf with a single-leg heel drop from a step.


Isolate and strengthen your calves while in a seated position — lift, then let the heel drop for full range control.

Build calf-strength together on both legs: raise and lower over a step for full range and control.

Add load and challenge your calf and ankle control with weighted penguin-style steps.

Target the soleus in a split-stance hold to build calf endurance and stability.

Strengthen your calves in a controlled, seated position to build power and endurance.

Strengthen both calves together with a simple, controlled heel lift.

Improve ankle mobility and calf control by tracing the alphabet with your foot.

A capsular stretch easing the shoulder into external rotation to a comfortable end of range. Sustained, gentle stretching helps restore external-rotation range in a stiff shoulder. A common mobility exercise after stiffness or a period of immobilisation.

Challenge your balance and calf stability by standing on one leg on an unstable surface.

Activate and strengthen the muscles at the front of the ankle to support calf and foot control.

Strengthen your calves and ankle stability with controlled band-resisted holds.

With a band around your knees stand up from a high seated position, so that the pain in your knee is kept to a minimum. Keep your knees over your second toes, with your back straight and body weight evenly spread over both feet. As you feel more comfortable, doing this you can lower the height of the seat and add some lightweights.
Reps:
Repeat 15-25 times, completing 3 sets


Begin in a supine position with heels positioned on sliding pads, or towel; in contact with slide board, or other suitable surface. Lift your hips into extension with the shoulders, hips, and knees aligned, and the ankles in a dorsiflexed position; creating stiffness throughout.
Instructions:
Keep your elbows tucked in to your sides to help create a stable base of support to perform the movement. Slowly slide your heels out as far as you can keep controlled and return to starting position.
Reps:
Repeat 6 – 8 repetitions 3 sets. Progress to doing it with one leg (affected leg). Aim for 6 -8 repetitions 3 sets. To progress further you can hold weight to chest and Nordics are introduced.

The patient is lying supine with arms placed in a comfortable position, knees flexed and foot on a step.
Instructions:
The patient is instructed to raise their untested leg off the examination table and then perform repetitions of hip extension, where they push down through the heel of the tested leg and lift the hips off the ground towards full hip extension.
Reps:
Repeat 10 – 12 repetitions. Progress to doing it with one leg (affected leg). Aim for 8 repetitions 3 sets. To progress further you can hold weight to chest

Starting position:
The exercise is started with the patient positioned with upright trunk, one hand holding on to a support and legs slightly split. All the body weight should be on the heel of the injured leg with approximately 10–20° knee flexion.
Instructions:
The patient is instructed to perform a gliding backward movement on the other leg and stop the movement before pain is reached. The movement back to the starting position should be performed by the help of both arms, not using the injured leg.
Sets:
6 x 3
Progression is achieved by increasing the gliding distance and performing the exercise faster.

Starting position:
The patient is standing with full weight on his injured leg and the opposite knee slightly flexed backwards.
Instructions:
The patient is asked to perform the exercise as a simulated dive (hip flexion from an upright trunk position) of the injured, standing leg and simultaneous stretching arms forward and attempting maximal hip extension.
Sets:
6 x 3
*Good quality, keep pelvis horizontally throughout the whole movement
*Maintain 10–20° knee flexion in the standing leg.

Starting position:
The patient is lying supine, holding and stabilise the thigh of the injured leg with the hip flexed approximately 90°.
Instructions:
The patient is instructed to perform slow knee extensions to a point just before pain is felt.
Sets:
12 x 3, 2 x per day
Progression:
Increase speed.

With your little finger and wrist supported on a table with your fingers straight. Lift your index finger up and away from the other fingers and aim to hold for 5 seconds. If this is easy progress to adding resistance using a light elastic band as shown below.
Repeat 12 – 15 times, repeat 3 sets.

Supporting your hand on a table, place the thumb tip and the index finger together, as shown, making a wide circle. The tip of your thumb should remain flexed at all times. Gently pinch keeping a good position, use pain as your guide as to how hard you preform the action.
Hold for 5 – 10 seconds, repeat 10 times.

With your little finger and wrist supported on a table with your fingers straight. Bring your thumb out to the side, away from your fingers and hold for 5 seconds, then bring the thumb back in.
Repeat 15 times, with 3 sets.

Self-massage to release the tightness or tension to the muscles in the web space between the index finger and thumb. This can be helpful to alleviate pain.
Massage for 5 minutes. If possible try to stretch the thumb away from the index finger at the same time.

Place the palm of your affected hand against your chest. With your other hand, wrap the fingers around the length of the thumb base as shown. Use the fingers of the unaffected hand to gently ‘roll ‘ the painful thumb away from the chest.
Hold for 20 – 30 seconds, repeat 3 – 5 times.

Grasp the painful thumb with the other hand, behind your back. Relax both arms and hands. Let the weight of the arms gentle provide traction to the joint at the base of the thumb. This can be done at the front if more comfortable.
Hold for 10 -15 seconds, when the joint is painful, repeat 3 – 5 times

Bring your thumb tip over towards your little finger tip. If this is easily manged, try to slide the thumb tip down to the base of the little finger for a gentle stretch.
Hold for 20 – 30 seconds, repeat 3 – 5 times.

A bent-over rowing exercise using a resistance band to strengthen the upper back and shoulder blades. Drawing the hands toward the lower ribs trains the muscles that retract and stabilise the scapula, supporting posture and shoulder health. The band offers an adjustable, joint-friendly load.
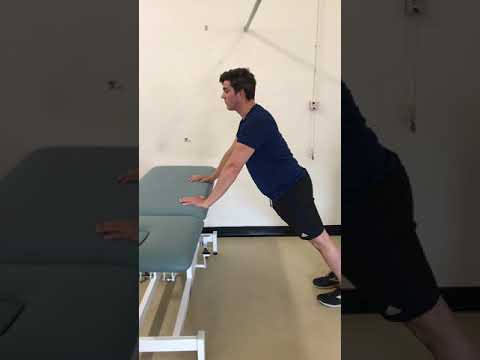
An inclined press-up with the hands on a table, reducing the load compared with a floor press-up. The raised angle makes it an accessible way to build pushing strength and shoulder control in the early-to-mid stages. A natural progression between wall and floor press-ups.

A wall-slide drill that combines smooth shoulder-blade movement with gentle rotator-cuff activation. Sliding the forearms up the wall trains coordinated overhead movement while keeping the cuff and scapula working together. A foundation exercise for restoring controlled elevation.

A static abduction hold pressing the arm gently outward against a fixed resistance, with no movement. This early isometric activates the cuff and shoulder muscles in a tolerable way before movement-based strengthening. Useful in the early, more painful stages of shoulder rehab.

A shoulder-blade activation drill drawing the scapulae down and together against a band. Adding resistance to the 'setting' action strengthens the muscles that stabilise the shoulder blade, which underpins healthy shoulder movement. A key activation exercise in shoulder rehab.

The classic press-up, a full upper-body strengthener for the chest, shoulders, arms and core. Lowering and pressing the body in a straight line builds pushing strength and trunk stability together. A benchmark exercise in later-stage shoulder and upper-limb rehab.

A lawnmower-style row that combines a pulling action with a little trunk rotation, with built-in progressions. Pulling a band or weight up toward the hip strengthens the shoulder blade and posterior shoulder in a functional pattern. The progressions let load and range increase as the shoulder improves.

An exercise that re-teaches raising the arm by first setting the rotator cuff, then lifting through range with control. Coordinating cuff activation with elevation helps restore smooth, pain-free shoulder movement. The progressions increase range or load as the shoulder recovers.

A bent-over row using free weights to build strength in the upper back and shoulder-blade muscles. Rowing toward the lower ribs while keeping a flat back works the scapular retractors and posterior shoulder. A staple pulling exercise for shoulder and posture rehab.

A prone (face-down) external-rotation exercise targeting the rotator cuff. Rotating the forearm upward with the upper arm supported isolates and strengthens the cuff's external rotators. A focused exercise for posterior cuff strength and shoulder stability.

A supported shoulder-mobility drill sliding the hand through a rotation movement on a table. Letting the surface take the arm's weight allows gentle, assisted movement when lifting the arm is still difficult. An early way to maintain and regain shoulder range.

An active mobility drill rotating the forearm in and out with the elbow tucked at the side. Moving the shoulder through its rotation range helps restore smooth, controlled movement. A gentle exercise for maintaining and regaining rotational mobility.

A mobility movement raising the arm out to the side through a comfortable range. Practising abduction helps restore the ability to lift the arm away from the body smoothly. A foundation drill for shoulder range and control.

A stretch for the upper trapezius, the muscle running along the side of the neck into the shoulder. Easing the ear toward the shoulder lengthens this commonly tight muscle and can relieve neck and shoulder tension. A simple stretch useful for tension and posture-related tightness.

A supported mobility drill sliding the hand out to the side on a table to ease the shoulder into abduction. The table supports the arm so the movement stays comfortable and low-effort. A gentle early-stage way to restore shoulder range out to the side.

A supported mobility drill sliding the hand forward and up on a table to ease the shoulder into flexion. With the surface taking the weight, the arm can move overhead more comfortably in early rehab. A gentle starting point for regaining forward shoulder range.

A static external-rotation hold that gently loads the rotator cuff without movement. With the elbow tucked, pushing into a fixed resistance activates the cuff in a pain-friendly way. A common early exercise when shoulder movement is still sensitive.

A press-up performed standing against a wall, the gentlest version of the movement. The upright angle greatly reduces the load, making it ideal for early-stage chest and shoulder strengthening. A confidence-building first step toward harder press-up variations.

A focused movement rotating the forearm outward away from the body, with the elbow kept at the side. Working external rotation restores range and gently engages the cuff's external rotators. A common early-to-mid stage shoulder mobility drill.

A mobility movement raising the arm forward and up overhead through a comfortable range. Working flexion helps restore the everyday ability to reach forward and overhead. A foundation shoulder-mobility exercise.

A foundational shoulder-blade drill drawing the scapulae gently down and together without resistance. Learning to 'set' the shoulder blades builds the control that underpins all other shoulder exercises. A simple but important starting point in shoulder rehab.

A capsular stretch easing the arm forward and overhead into flexion, often assisted by a surface or the other arm. Holding at a comfortable stretch helps restore overhead reach in a stiff shoulder. A foundation stretch for regaining forward range.

A capsular stretch easing the shoulder into internal rotation, for example by bringing the hand up the back. Holding at a comfortable stretch helps lengthen the posterior shoulder capsule and restore rotation. Useful where internal-rotation range is limited or stiff.

A capsular stretch easing the arm out to the side into abduction and holding at a comfortable stretch. Gentle, sustained loading helps restore the range needed to lift the arm sideways. Useful for a stiff or restricted shoulder.

The eighth and most advanced stage of a staged exercise programme for an age-related rotator cuff tear. By this point the shoulder is working at the highest load and demand in the series, building toward full strength and function. The specific exercises should be confirmed from the clip, and all work kept within comfort under clinical guidance.
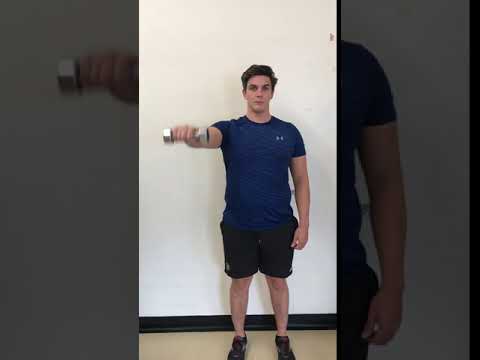
The seventh stage of a staged programme for an age-related rotator cuff tear, continuing to advance the shoulder's strength, control and load tolerance. It builds on the earlier stages toward higher-level function. Confirm the exact exercises from the clip and progress within comfort under guidance.

The sixth stage of a staged rotator cuff tear programme, further advancing shoulder loading and control. It bridges the mid and later stages of the series as strength and confidence grow. Confirm the specific exercises shown and progress within comfort under clinical advice.

The fifth stage of a staged programme for an age-related rotator cuff tear, building further strength and control as the shoulder moves through the mid-stages. Confirm the exact exercises from the clip and work within comfort under guidance.

The fourth stage of a staged rotator cuff tear programme, increasing the demand on the shoulder as it moves beyond the early phases. Confirm the specific exercises shown and progress within comfort under clinical advice.

The third stage of a staged programme for an age-related rotator cuff tear, progressing from the gentle early movements toward greater strength and control. Confirm the exact exercises from the clip and work within comfort under guidance.

The second stage of a staged rotator cuff tear programme, progressing gently from the introductory movements of stage one and building on early activation and range. Confirm the specific exercises shown and work within comfort under clinical advice.
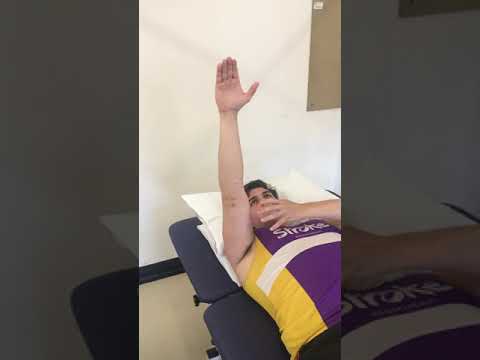
The first stage and starting point of a staged exercise programme for an age-related rotator cuff tear. It introduces gentle early movements and activation to begin restoring shoulder function safely. Confirm the specific exercises from the clip, keep everything pain-free and follow clinical guidance.

A banded wrist-extension exercise strengthening the muscles that lift the back of the hand. Working against the band's resistance builds wrist-extensor strength and endurance through range. A practical, adjustable option commonly used in wrist and tennis-elbow rehab.

A static wrist-extension hold with a light weight, loading the extensors without movement. Isometric holds are a gentle, well-tolerated way to start strengthening when movement is still uncomfortable. A common early step in wrist and elbow rehab.

A wrist-extension strengthening exercise lifting the back of the hand upward through range (the source title carries a small typo for 'extension'). It targets the wrist extensors and can be progressed by adding light resistance. A foundation movement for wrist and forearm strength.

An eccentric wrist-extension exercise emphasising the slow, controlled lowering phase. Eccentric loading is a well-established approach for building tendon capacity and is often used in tennis-elbow-type rehab. Helping the lift with the other hand keeps the focus on the lengthening phase.

A static hold keeping the wrist extended against a light weight, with no movement. This early isometric gently loads the wrist extensors in a pain-friendly way before progressing to moving exercises. A starting point for rebuilding wrist-extensor strength.

Seated calf raises loaded with around 10kg resting on the thighs, biasing the soleus part of the calf. The bent-knee position shifts the work onto the soleus, which is important for walking, running and Achilles rehab. Adding the weight progresses the exercise to build strength and endurance.

A static ankle-eversion hold pushing the foot outward against a band, with no movement. This pain-friendly isometric strengthens the muscles on the outer ankle that help guard against the ankle rolling. A common early-stage exercise after ankle sprains.

A static heel-raise hold, rising onto the balls of the feet and holding the position to load the calf without movement. Isometric calf holds are a well-tolerated early way to build strength and can help settle Achilles symptoms. A common starting point in calf and Achilles rehab.

Jogging on the spot with brief holds added to challenge balance and control. The light, repeated foot contacts reintroduce running-style loading, while the holds test single-leg stability. A useful early return-to-running and calf-conditioning drill.
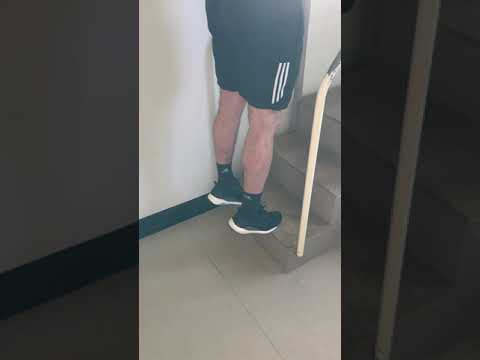
Calf raises performed over a step edge, progressing from two legs to one as strength allows. Lowering the heels below the step works the calf through its full range, and the single-leg version markedly increases the load. A staple for building calf strength and Achilles capacity.

A squat performed on a Bosu or wobble surface to challenge balance and control. Managing the unstable base recruits the stabilising muscles around the ankle and knee while strengthening the legs. A progression that adds a balance element to the basic squat.

A single-leg balance exercise performed on a Bosu or wobble cushion to increase the challenge. Controlling the wobble trains the ankle, hip and balance system together. Can be progressed with head turns or eyes closed for an added demand.

A banded forward-and-back walking drill in a half-squat to activate the glutes and lateral hip. Keeping tension on the band with the knees pushed out switches on the muscles that stabilise the hip and knee. A popular warm-up and activation exercise for the lower limb.
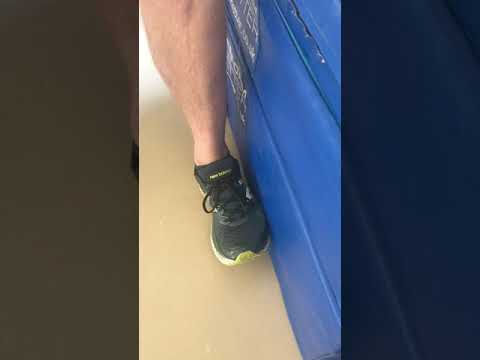
A static hold pushing the foot outward (eversion) against a fixed resistance, with no movement. This gentle isometric is an early way to load the outer ankle muscles, often after a sprain. A pain-friendly starting point before moving exercises.

A static heel-raise hold, holding the body up on the balls of the feet to load the calf without any movement. Isometric holds are a gentle, well-tolerated way to begin calf strengthening and can help calm Achilles symptoms. A common early-stage loading exercise.

A calf exercise that rises on two legs and lowers on one, combining a two-leg lift with a single-leg eccentric drop. This 'concentric on two, eccentric on one' method is a common way to bridge toward full single-leg work. A useful progression in calf and Achilles strengthening.

A two-leg calf exercise lowering the heels first to neutral, then progressing to a full drop below the step. Gradually increasing the range builds calf strength and Achilles tolerance in manageable steps. An accessible early-stage heel-drop exercise.

A lunge performed using a step to build single-leg strength and control. Lowering under control with the knee tracking over the foot loads the quads and glutes. A foundation lower-limb strengthening exercise.

A static calf hold performed with the balls of the feet on a step edge, sustaining a raised-heel position over the step. Using the step allows a fuller position while still loading the calf without movement. A pain-friendly way to build early calf strength through a slightly greater range.

A static calf contraction pushing the foot down into plantar flexion against a band, with no movement. This gentle isometric loads the calf and ankle early in rehab, before progressing to moving exercises. A well-tolerated starting point for calf and Achilles loading.

An eccentric single-leg calf exercise, lowering the heel below a step on one leg. Rising with help from both feet and lowering on one emphasises the controlled lengthening phase, a key approach in Achilles and calf rehab. An important strengthening drill once basic capacity has returned.

A single-leg balance exercise with added head turns to challenge stability further. Turning the head disrupts the balance system, forcing the ankle and hip to work harder to stay steady. A useful progression once basic single-leg balance is comfortable.

An educational video, not an exercise, in which an orthopaedic consultant explains what Greater Trochanteric Pain Syndrome (GTPS) is, including its causes and what it means for the outer hip. It gives a clear understanding of the diagnosis. Helpful background for anyone new to the condition.

An educational video, not an exercise, in which a dietician explains how healthy eating and good nutrition can support people managing Greater Trochanteric Pain Syndrome (GTPS). It sets out why diet matters alongside activity and rehab. Useful context to complement the exercise programme.

An educational talk, not an exercise, in which a pain specialist physiotherapist discusses how to manage pain in Greater Trochanteric Pain Syndrome (GTPS), a common cause of pain over the outer hip. It covers practical approaches to settling symptoms and living with the condition. Helpful background to support the exercise side of a GTPS programme.

An educational video, not an exercise, in which a specialist physiotherapist explains why exercise and an active approach help in Greater Trochanteric Pain Syndrome (GTPS), and the thinking behind the exercise programme. Useful context and motivation for patients getting started.
