
A controlled lower-body movement focusing on ankle stability and strength while using a surface for support.

Performing a squat on a foam pad or balance board to challenge ankle proprioception and core stability.


Uses a resistance band to strengthen the lateral and medial muscles of the ankle.

Enhances calf strength and ankle range of motion by performing heel raises with the heels hanging off a step.

Improves balance and reactive ankle stability by standing on one leg on an uneven surface.

A foundational exercise for building calf strength and improving ankle plantarflexion power.

Static holds against resistance to activate ankle stabilizers without joint movement.

A series of dynamic movements designed to improve the specific range of motion required for running.

Deep squatting movements aimed at improving dorsiflexion and lower-limb flexibility.

Uses a band to create joint space while moving the ankle into dorsiflexion, helping to clear joint "pinching."

A basic balance exercise to improve ankle stability and lower-limb coordination.

A calf stretch performed with a bent knee to specifically target the deeper soleus muscle.

A classic straight-leg stretch against a wall to target the gastrocnemius muscle.

A common assessment and mobility exercise used to measure and improve ankle dorsiflexion.

Stretching the front of the ankle or improving range by pushing the knee forward over a step.

Advanced exercise combining upper-limb weight-bearing and wrist loading. Progresses from wall support into press-up position to prepare for functional and sporting activities.

Demonstrates wrist flexion against elastic resistance, progressing wrist strength and control in later-stage rehabilitation.

Shows radial deviation performed against a resistance band to enhance wrist stability and lateral strength.

Demonstrates wrist extension against elastic resistance to improve strength and endurance through a controlled range of movement.

Strengthening exercise focusing on bending the wrist against a weight to build wrist flexor strength and functional capacity.

Shows controlled wrist movement toward the thumb side against resistance. This exercise strengthens radial wrist stabilisers and improves control.

Demonstrates wrist extension against a handheld weight to strengthen the wrist extensor muscles as part of progressive rehabilitation.

Functional twisting movement using a cloth to strengthen the wrist and forearm muscles while improving coordination and grip endurance.

Combines grip strength with controlled elbow bending and wrist extension. This exercise improves coordination and functional upper-limb strength.

Gentle gripping exercise using a sponge or small ball to improve hand strength, circulation and control during wrist rehabilitation.

Demonstrates wrist flexor activation against resistance without joint movement. This exercise builds early strength while protecting the healing wrist.

Static strengthening exercise where the wrist pushes into resistance without movement. Helps activate wrist extensor muscles safely in the early stages of strengthening.

Static strengthening exercise where the wrist pushes into resistance without movement. Helps activate wrist extensor muscles safely in the early stages of strengthening.

Shows side-to-side wrist movement with the hand supported on a table. This exercise improves wrist mobility while minimising strain during early rehabilitation.

Demonstrates controlled bending and straightening of the wrist to restore range of movement and reduce stiffness following injury or immobilisation.

Demonstrates thumb straightening and movement across the palm toward the fingers. This exercise restores thumb mobility, coordination and functional hand use after cast removal.

Progresses the MCP grip into full knuckle flexion to further improve tendon excursion and finger range of movement following immobilisation.

Focuses on bending the knuckles while keeping the fingers relatively straight to encourage tendon movement. This exercise supports finger control and mobility during early wrist rehabilitation.

Guided movement into a full fist to encourage tendon gliding and finger flexion. Used post-cast to restore hand mobility and reduce swelling and stiffness.

Demonstrates a hook-fist position to promote smooth tendon movement through the fingers. This exercise helps reduce stiffness and improve finger mobility following cast removal.

Gentle thumb movements performed within the limits of the cast. This exercise helps maintain thumb mobility, reduce stiffness and support hand function while protecting the healing wrist.

This exercise focuses on bending the knuckles (metacarpophalangeal joints) while keeping the fingers relatively straight. It helps maintain finger joint mobility, reduce stiffness and support hand function during wrist and hand rehabilitation.

Demonstrates a full hand gripping movement performed while the wrist is immobilised in a cast. This exercise helps maintain finger strength, promote circulation and prevent stiffness in the hand during the early stages of wrist fracture recovery.

Shows a hook-fist movement where the fingers bend at the middle and end joints while the knuckles remain straight. This exercise is used during the cast phase to maintain tendon mobility and reduce finger stiffness without stressing the healing wrist.

This movement allows for unilateral strengthening of the quadriceps, glutes, and hamstrings while the back is supported. By using one leg at a time, you can effectively identify and correct strength imbalances between your left and right sides. Focus on keeping your knee tracked directly over your mid-foot (avoiding internal collapse) and maintain a flat lower back against the pad throughout the entire range of motion to ensure the force is driven through the hip and leg.

An anti-rotation drill that forces the core and hips to resist twisting. By pressing a band or cable straight out from the chest, you train the obliques and glutes to stabilize the spine. Keep your feet rooted and glutes squeezed to prevent the torso from rotating toward the anchor point.

A lunge variation that targets the glute medius and adductors. By stepping one foot behind and across the other, you challenge hip stability in a rotational plane. Keep your front knee tracked over your toes and your torso upright to maximize glute loading and improve lateral hip control.

A functional movement targeting the lateral glutes and VMO. By crossing the outside leg over to a box, you emphasize hip adduction and stability under load. Focus on driving through the heel of the elevated foot and controlling the descent to build better knee tracking and hip power.

This lunge variation uses an unstable surface, like a foam pad or suspension trainer, to challenge the stabilizers of the hip, knee, and ankle. It forces the glute medius to work harder to maintain alignment. Focus on slow, controlled repetitions to ensure the front knee does not cave inward during the movement.

Performing a goblet squat on a BOSU or foam pad increases demand on the deep hip stabilizers and core. Holding the weight at chest height acts as a counterbalance, allowing for a deeper squat. Focus on spreading the floor with your feet to maintain balance and prevent the knees from collapsing.

This exercise places the rear foot on a bench to isolate the front leg. It provides a deep stretch to the rear hip flexor while building significant strength in the glute and quad of the lead leg. Keep your front shin relatively vertical and your core tight to avoid excessive arching in the lower back.

Widely considered the best exercise for glute hypertrophy. By placing the upper back on a bench and driving the hips upward against resistance, you maximize tension on the gluteus maximus at short muscle lengths. Focus on keeping the chin tucked and ribs down to ensure the movement comes from the hips rather than the lower back.

A compound movement that builds strength in the quads, glutes, and hamstrings. By using a machine, you can move heavier loads with a stable spine. Ensure your feet are shoulder-width apart and avoid locking your knees at the top. Keep your tailbone pressed firmly against the seat to protect your lower back.

The ultimate test of posterior chain strength. This movement involves lifting a barbell from the floor to a standing position by hinging at the hips. Focus on keeping the bar close to your shins, maintaining a neutral spine, and driving through the floor with your legs to engage the glutes and hamstrings.

The hex bar allows for a more upright torso, reducing shear stress on the lower back compared to a straight bar. It distributes the load more evenly between the quads and the posterior chain. Focus on sitting the hips back and driving through the mid-foot to stand, keeping your chest up throughout the lift.

Adding dumbbells or a barbell to a standard lunge increases the demand on the glutes and quads. This variation builds unilateral strength and improves pelvic stability under load. Focus on maintaining a tall posture and ensuring your front knee stays aligned with your middle toe as you descend.

A fundamental strength movement where a barbell is supported on the upper back. It targets the entire lower body, including the quads, glutes, and hamstrings. Maintaining a neutral spine and driving the knees out are key to proper hip mechanics. Ensure your weight is distributed across the mid-foot to maintain balance.

This variation uses a fixed track to provide extra stability, allowing you to focus purely on leg drive. By placing your feet slightly forward, you can maintain a more upright torso and shift more tension onto the quadriceps while reducing lower back strain. Ensure the bar rests on your traps, and use the safety stoppers to train safely near failure without a spotter.

A dynamic core and cardiovascular exercise performed from a plank position. By driving your knees toward your chest in a running motion, you engage the abdominals and hip flexors while building shoulder stability. Focus on keeping your hips level and your shoulders stacked over your wrists to maintain tension throughout the movement.

A rotational core exercise that targets the obliques and transverse abdominis. Sitting with your knees bent and feet elevated, you rotate your torso from side to side. Focus on moving your shoulders as a unit rather than just reaching with your arms to ensure the core muscles are doing the work. Keep your spine long and avoid rounding your back.

A core exercise that emphasizes the lower abdominals and hip flexors. While lying on your back, you slowly lower your legs toward the floor and lift them back up. The key is to keep your lower back pressed firmly into the ground to ensure your core, not your spine, is managing the load.

A stabilising exercise where the body is supported by one hand and the side of the foot. It targets the obliques, transverse abdominis, and shoulder stabilisers. Keep your hips lifted in a straight line from head to heels. Ensure your supporting hand is directly under your shoulder and your core is tight to prevent rotation or sagging.

This variation uses an isometric cue to maximize shoulder and upper back engagement. While in a standard plank, imagine trying to tear the floor in half by pushing your hands or elbows outward without actually moving them. This tension activates the posterior deltoids and scapular stabilizers, creating a more robust "pillar" of stability throughout your entire torso.

A core stability movement that teaches you to move your limbs while keeping your spine neutral. By extending the opposite arm and leg while lying on your back, you challenge the abs to prevent the lower back from arching. Focus on slow, rhythmic breathing and keeping your ribcage tucked down toward your pelvis.

This exercise targets the gastrocnemius and soleus muscles by allowing a greater range of motion than floor raises. By hanging your heels off the edge of a step, you can lower them below neutral to stretch the calf and Achilles tendon before driving upward. Focus on a controlled descent to improve ankle mobility and build explosive power for walking and running.

Standing tall, take a large step forwards with your injured leg and bend that knee until the opposite knee is approximately 5cm above the ground, then extend through the hip and knee to return to the starting position. Remember to keep your back straight throughout the movement

Stand facing a step of appropriate height. Put your injured leg on the step and step up by extending through your hip and knee, bringing the other leg through at a right angle. Keep the movement controlled as possible with your knee tracking over your second toe

With the band around your knees/thigh assume a quarter squat position. Take medium size strides to the side and back again keeping tension on the band throughout for 10 steps and then change to opposite direction.

Lying on your back with your knees bent (operated side back further than the other), squeeze your bottom muscles and tighten your stomach muscles. Lift your bottom off the bed until there is a straight line between your shoulders and knees. To add a further challenge, imagine there is a nut between your buttocks which you are trying to crush.

With a band around your knees, select an appropriate weight. Perform a squat as far as you feel comfortable, by sitting back, keeping your knees over your second toes, with your back straight and body weight evenly spread over both feet.

On your hands and knees (4 point kneeling) with a band around your knees. In a controlled manner bring our leg back with your heel towards the sky and turn your knee outwards. Slowly return to starting position and repeat.

This stretch targets the small muscle deep in the buttock that can cause sciatic-like pain when tight. From a seated or lying position, cross one ankle over the opposite knee and gently pull the leg toward the chest. Focus on a deep, steady stretch in the gluteal region to improve hip mobility and relieve pressure on the sciatic nerve.

This stretch targets the inner thigh muscles. Stand with a wide stance and shift your weight to one side, bending that knee while keeping the other leg straight. You should feel a pull along the inner thigh of the straight leg. Keep your chest up and hips back to deepen the stretch.

Focuses on the back of the thighs. From a standing or seated position, hinge at the hips with a flat back, reaching toward your toes. Keep a slight bend in the knees to protect the joints and ensure the stretch remains in the muscle belly. Hold for 30 seconds to improve flexibility and lower back health.

Stand on one leg, grab your opposite ankle, and pull your heel toward your glutes. Keep your knees together and tuck your pelvis to deepen the stretch in the front of the thigh. This improves hip mobility and knee health.

Lie on your back at the edge of a bench or bed, pulling one knee to your chest while letting the other leg hang freely. This position uses gravity to stretch the iliopsoas and rectus femoris. Ensure your lower back remains flat against the surface to isolate the hip flexors and prevent lumbar arching.

This stretch targets the iliopsoas and rectus femoris. Kneel on one knee with the other foot flat in front. Tuck your pelvis and shift your weight forward until you feel a pull in the front of your hip. Keep your torso upright to maximise the stretch.


Lying on your back with your knees bent, with a band around your knees, squeeze your bottom muscles and tighten your stomach muscles. Keep your feet flat, dig your heels into the floor, this will increase the activity in your hamstrings. Lift your bottom off the bed until there is a straight line between your shoulders and knees, to add a further challenge, imagine there is a nut between your buttocks which you are trying to crush.
In side lying, have your bottom knee bent to 90° and the top leg straight, with the band around both knees. Lift your top leg up and back without rotating your pelvis or spine.


In sitting push up onto your tip toes activating the calf muscles hold for 10 seconds, repeat 10 times.

In lying with a rolled up towel (or something firm), push your knee down and extend your leg activating the quad muscles (the big muscle at the front of your thigh).
Hold for 10 seconds, repeat 10 times.
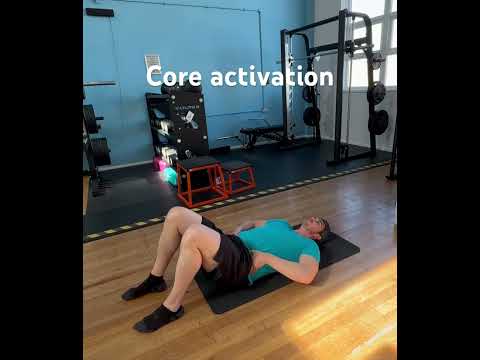
In lying with your knees bent, gently squeeze your stomach muscles whilst almost trying to pull your pelvic muscles upwards.
Hold for 10 seconds, repeat 10 times.

In lying gently squeeze your bottom muscles together.
Hold for 10 seconds, repeat 10 times.

In standing, holding onto a stable surface for support, slowly lift your knee behind you and return to starting position.

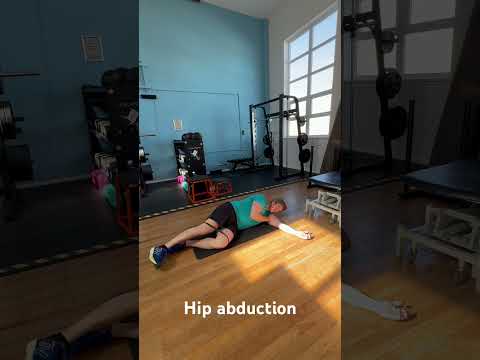
In standing, holding onto a stable surface for support, slowly lift your leg out to the side and return to starting position.

In standing, holding onto a stable surface for support, slowly lift your knee up to a right angle and return to starting position.
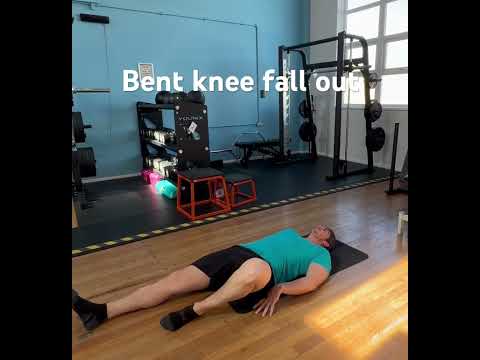
In lying with your knee slightly bent, ensure your tummy is tight, slowly allow your knee to fall out to the side in a controlled fashion and return to the starting position.

Lying on your back slowly slide your heel outwards, in a slow controlled manner and slowly return to starting position. Do this on a slippy surface for ease of movement. e.g. a sock on a wooden floor.

Lying on your back slowly slide your heel towards your bottom, flexing at your hip and return to starting position in a controlled manner. Do this on a slippy surface for ease of movement. e.g. a sock on a wooden floor.

Stand facing a step of appropriate height. Put your injured leg on the step and step up, bringing the other leg through at a right angle. Keep the movement as controlled as possible with your knee tracking over your second toe.
Repeat 10 times, completing 3 sets, build to 15 times and 3 sets
With a band around your knees, select an appropriate weight and hold up to your chin in front of you. Perform a squat as far as you feel comfortable, by sitting back, keeping your knees over your second toes, with your back straight and body weight evenly spread over both feet.
You can make this easier by doing this movement from a chair but on elevation, imagine there is a nut between your buttocks which you are trying to crush.
Repeat 10 times, completing 3 sets, build to 15 times and 3 sets

Lying on your back with your knees bent and band around your knees. Squeeze your bottom muscles and tighten your stomach muscles. Lift your bottom off the bed until there is a straight line between your shoulders and knees.
Keep your knees apart against the resistance of the band. By keeping your feet flat, digging your heels into the floor you will increase the activity in your hamstrings. Then on elevation, imagine there is a nut between your buttocks which you are trying to crush.
Hold for 5 – 10 seconds, repeat 5 times, 3 sets

Use stair jumps to develop elastic power; emphasise calf-driven take-off and quiet, controlled descents.

Develop lower-leg power and controlled landings with box jumps and drop-downs.
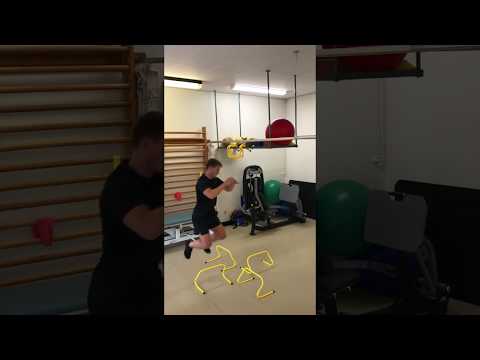
Challenge calf and lower-leg stability while training agility and change-of-direction with hurdle jumps and a sharp 90° turn.

Strengthen your calves and sharpen forward control with linear hurdle jumps.

Quick-feet agility drills with an emphasis on calf activation and coordination.

Isolate and build strength in your calf with a single-leg heel drop from a step.

Train your calves to react fast and bounce strong with quick, continuous hops.

Isolate and strengthen your calves while in a seated position — lift, then let the heel drop for full range control.

Build calf-strength together on both legs: raise and lower over a step for full range and control.

Add load and challenge your calf and ankle control with weighted penguin-style steps.

Target the soleus in a split-stance hold to build calf endurance and stability.

Strengthen your calves in a controlled, seated position to build power and endurance.

Strengthen both calves together with a simple, controlled heel lift.

Improve ankle mobility and calf control by tracing the alphabet with your foot.

Challenge your balance and calf stability by standing on one leg on an unstable surface.

Activate and strengthen the muscles at the front of the ankle to support calf and foot control.

Strengthen your calves and ankle stability with controlled band-resisted holds.

With a band around your knees stand up from a high seated position, so that the pain in your knee is kept to a minimum. Keep your knees over your second toes, with your back straight and body weight evenly spread over both feet. As you feel more comfortable, doing this you can lower the height of the seat and add some lightweights.
Reps:
Repeat 15-25 times, completing 3 sets


Begin in a supine position with heels positioned on sliding pads, or towel; in contact with slide board, or other suitable surface. Lift your hips into extension with the shoulders, hips, and knees aligned, and the ankles in a dorsiflexed position; creating stiffness throughout.
Instructions:
Keep your elbows tucked in to your sides to help create a stable base of support to perform the movement. Slowly slide your heels out as far as you can keep controlled and return to starting position.
Reps:
Repeat 6 – 8 repetitions 3 sets. Progress to doing it with one leg (affected leg). Aim for 6 -8 repetitions 3 sets. To progress further you can hold weight to chest and Nordics are introduced.

The patient is lying supine with arms placed in a comfortable position, knees flexed and foot on a step.
Instructions:
The patient is instructed to raise their untested leg off the examination table and then perform repetitions of hip extension, where they push down through the heel of the tested leg and lift the hips off the ground towards full hip extension.
Reps:
Repeat 10 – 12 repetitions. Progress to doing it with one leg (affected leg). Aim for 8 repetitions 3 sets. To progress further you can hold weight to chest

Starting position:
The exercise is started with the patient positioned with upright trunk, one hand holding on to a support and legs slightly split. All the body weight should be on the heel of the injured leg with approximately 10–20° knee flexion.
Instructions:
The patient is instructed to perform a gliding backward movement on the other leg and stop the movement before pain is reached. The movement back to the starting position should be performed by the help of both arms, not using the injured leg.
Sets:
6 x 3
Progression is achieved by increasing the gliding distance and performing the exercise faster.

Starting position:
The patient is standing with full weight on his injured leg and the opposite knee slightly flexed backwards.
Instructions:
The patient is asked to perform the exercise as a simulated dive (hip flexion from an upright trunk position) of the injured, standing leg and simultaneous stretching arms forward and attempting maximal hip extension.
Sets:
6 x 3
*Good quality, keep pelvis horizontally throughout the whole movement
*Maintain 10–20° knee flexion in the standing leg.

Starting position:
The patient is lying supine, holding and stabilise the thigh of the injured leg with the hip flexed approximately 90°.
Instructions:
The patient is instructed to perform slow knee extensions to a point just before pain is felt.
Sets:
12 x 3, 2 x per day
Progression:
Increase speed.

With your little finger and wrist supported on a table with your fingers straight. Lift your index finger up and away from the other fingers and aim to hold for 5 seconds. If this is easy progress to adding resistance using a light elastic band as shown below.
Repeat 12 – 15 times, repeat 3 sets.

Supporting your hand on a table, place the thumb tip and the index finger together, as shown, making a wide circle. The tip of your thumb should remain flexed at all times. Gently pinch keeping a good position, use pain as your guide as to how hard you preform the action.
Hold for 5 – 10 seconds, repeat 10 times.

With your little finger and wrist supported on a table with your fingers straight. Bring your thumb out to the side, away from your fingers and hold for 5 seconds, then bring the thumb back in.
Repeat 15 times, with 3 sets.

Self-massage to release the tightness or tension to the muscles in the web space between the index finger and thumb. This can be helpful to alleviate pain.
Massage for 5 minutes. If possible try to stretch the thumb away from the index finger at the same time.

Place the palm of your affected hand against your chest. With your other hand, wrap the fingers around the length of the thumb base as shown. Use the fingers of the unaffected hand to gently ‘roll ‘ the painful thumb away from the chest.
Hold for 20 – 30 seconds, repeat 3 – 5 times.

Grasp the painful thumb with the other hand, behind your back. Relax both arms and hands. Let the weight of the arms gentle provide traction to the joint at the base of the thumb. This can be done at the front if more comfortable.
Hold for 10 -15 seconds, when the joint is painful, repeat 3 – 5 times

Bring your thumb tip over towards your little finger tip. If this is easily manged, try to slide the thumb tip down to the base of the little finger for a gentle stretch.
Hold for 20 – 30 seconds, repeat 3 – 5 times.